Main index


Hold Curser Over Button For Contents

BRAKE PADS   MASTER CYLINDERS   RESERVOIRS   FLUIDS   AP CALIPERS   CALIPER REBUILD SEALS AP  BREMBO  ATE  GIRLING    BRAKE PEDAL BIAS CABLES

SAFETY HARNESS   KONI DAMPERS   SFI BAR PADDING   FUEL CELLS   MIRRORS   STEERING WHEEL HUBS   BEAD SEATING

PUSH-PULL CABLES   TENSION (THROTTLE) CABLES   BODY MOUNT CABLES

OIL COOLERS   CUSTOM RADIATORS   COOLANT HOSE/CLAMPS

AP RACING CLUTCH   HEWLAND GEARBOX   WHEEL BEARINGS   CV JOINTS   MIL-SPEC U-JOINTS


BELL HELMETS   HANS DEVICE   RACING UNIFORMS   MALE & FEMALE RACING UNIFORMS   MALE & FEMALE RACING UNDERGARMENTS    RACING GLOVES    RACING SHOES

RACING BATTERIES   LED WARNING INDICATORS   MASTER AND TOGGLE SWITCHES     BOSCH IGNITION      WIRE CONNECTORS     THIN WALL ELECTRICAL WIRE     CRIMPING TOOL

AN FASTENERS   JET NUTS   JAM NUTS   TY-RAPS   TERRY SPRINGS   CAPTIVE HOOD PINS   CAPTIVE WASHERS

RED LINE SYNTHETIC PRODUCTS

BELL HELMET ACCESSORIES   WEBER CARBURETORS   WEBER AIR FILTERS   CIRCUIT WORKERS SAFETY CUSTOM ALLOY WINGS


EARL'S PERFORMANCE BRAKE, FUEL, OIL HOSE   HOSE-END FITTINGS   HOSE ADAPTERS   WELD-ON FITTINGS   FLAME GUARD HOSE INSULATION   HEAT CLOTH

AURORA ROD-END AND SPHERICAL BEARING   MIL-SPEC U-JOINTS   WHEEL BEARINGS

SERVICES WE CAN PERFORM FOR YOU

SAFETY KLEEN PRODUCTS   HYLOMAR   COPASLIP   AUTOSOL   TIRE GAUGES   WIRE PLIERS   CLECO'S   PYROMETERS   DZUS TOOLS   ALLOY HOSE WRENCH   ROBIC WATCHES

PANASPORT ALLOY RACE STREET WHEELS


New Stuff

OUR CONTACT INFORMATION


hans bead seat step by step guide


Note: The new HANS bead material is SFI approved and dark gray, not white as shown in this step by step.


hans bead seat installation step 1

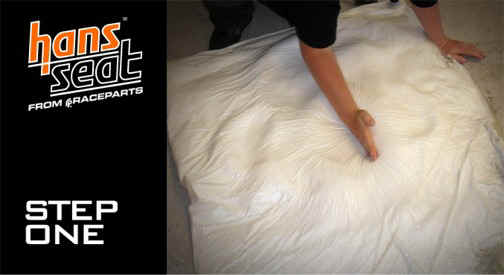
Step One: Lay the bag onto a flat surface. Form a seat shape. Apply a slight vacuum. Put the bag in the car and get the driver into the car.


hans bead seat installation step 2

Step two: If you have too many beads, remove bag, remove valve and empty excess beads. Once the driver is happy with the bead volume, driver out and remove bag.


hans bead seat installation step 3

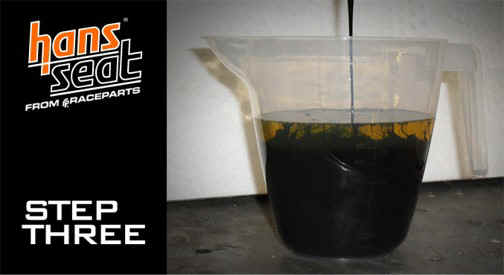
Step three: With the bag removed from the car, remove the valve. Mix resins. Make sure you use the wooden mixing stick to remove all resins from inside the container. Some die, included to make the job easier, may have settled to the bottom. Please refer to the instructions for resin ratio's. 


hans bead seat installation step 4

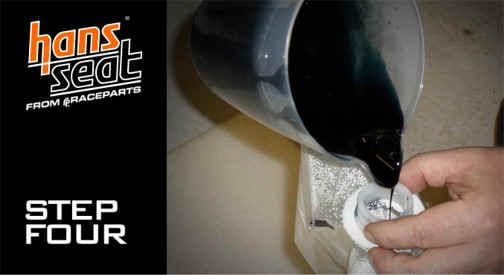
Step four: Pour resins into bag. You will see the resins fall to the bottom of the bag. Re-fit valve.


hans bead seat installation step5

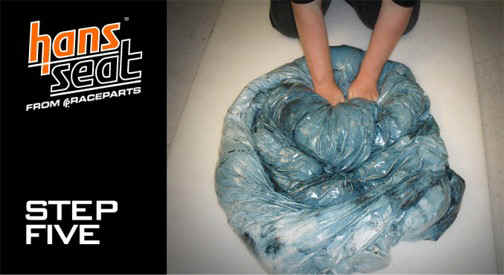
Step five: Mix the beads and resins together. The beads will change color when mixed. Will take 5 - 10 minutes.


hans bead seat installation step 6

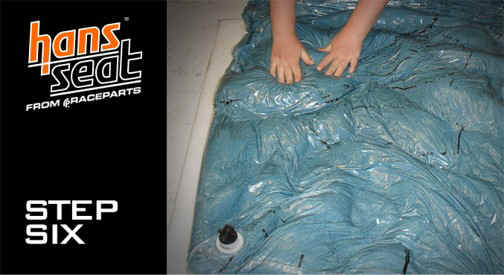
Step six: Form a seat shape again. Apply slight vacuum. Make sure you remove creases from the front and back.


hans bead seat installation step 7

Step seven:  Put bag back into the car. Take time to re-position the seat before the driver get in. Have driver get back in.


hans bead seat installation step 8

Step eight. Make the seat. Apply full vacuum. You can make adjustments for 60 minutes from mixing.


© Copyright 2020 Averill Racing Stuff, Inc.
Madison Heights Michigan
Phone 248-585-9139  Fax 248-585-9242